 graphics
Computer graphics come in two sorts: bitmaps and vectors
There are two basic formats for images displayed on a computer – bitmap and vector.
Bitmap images are precisely that, a map of the colours of each point on the image. Photos are a good example, although any image could be displayed as a bitmap. Examples of bitmap formats are tif, jpg and gif
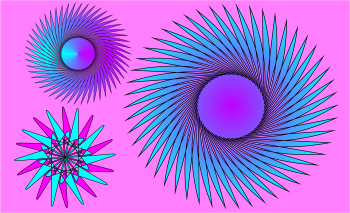
The other type is the vector image. Here the image is represented through mathematical curves and fills. Although the image ends up as a set of dots on the screen, these dots are calculated 'on the fly' at the time the image is displayed. Such images remain sharp at any size, whereas with a bitmap, magnification will eventually render the dots visible and outlines will be fuzzy (as in shot 1 illustrated below). Because maths varies between programs, most vector image formats are program specific, although some simple images can be represented in wmf or emf.
When it comes to web page images, the final image is usually a gif or jpeg
file, since these are readable by most browsers. Thus vector images are usually
pre-exported to gif or jpg.
Gif or png files are usually the best way of rendering diagrams and
logos that are made up of large areas of one colour.
Jpg files are the most efficient way to represent photos. There is
a compression mechanism built in that reduces file size in return for a slight
loss of quality. (You can choose how much) With images containing large areas
of one colour, this compression can lead to visible 'artefacts'. Every time
a jpg is resaved, it may deteriorate, so always keep your original or save
your prepared image as a tif before saving as a jpg.
Scaleable vector graphics (SVG) format
These images are supported by modern browsers, defined in a text based script
which can be inserted directly into the html text and remain as vectors. They
respond to CSS styles. Here is an example with a blue border. You can view
the code through view page source. Equally you can use the img tag
in the normal way as shown here with a red border. To get the two images to
look the same I had to specify the height of the embedded copy in addition
to the width. Many vector graphic programs can export to SVG and that is the
simplest way to create them. See
https://www.w3schools.com/graphics/svg_intro.asp for more information
on the coding. Warning: not all browsers may support this. The third example
with green border is from scratch, a work in progress.
Think in pixels
Computer screens have a set resolution of pixels per inch, so anything
of higher resolution will be rerendered by the browser for display
on the screen. This means that for web pages there is an optimum dimension
in pixels based on 96 or 72 pixels per inch, This is significantly
less than the printed version, which may be around 300 dots per inch.
Photos for the web need to be processed down to this optimum size
by a process known as resampling or downsampling. So, if you know
your page width in pixels (typically 600-800 pixels) then you can
calculate the required image width as a proportion of that number.
Always specify the required size in the html image tag. This allows
the rest of the page to appear around the image before the image is
fully loaded.
The optimum order of processing should always be rotate, crop, resample, brightness/contrast, touch-up, convert to sRGB (if necessary, many images are already in sRGB) sharpen, export to jpg. Once resampled, always view your image full size while processing.
Preparing diagrams, buttons and logos
Ideally these will be drawn using a vector program. The pixel dimensions will be set to match the requirements of the final image size on screen. The image will be exported to a gif, during which the number of colours can be chosen to keep the file size down. Every time a change is needed, the vector image is revised and re-exported.
About anti-aliasing
The pixels on your screen are effectively visible to the naked eye.
When representing a curved boundary between two colours on the screen
it is not possible to create a smooth curve using just the two colours.
Shot 2 below shows the best that can be done. Image programs get round
this by blending the two colours at strategic points along the boundary.
This 'blurring' of the boundary is known as anti-aliasing, as illustrated
by shot 3.

About transparency
It is possible to set one colour (and only one) in a gif to transparent,
allowing the page background to show through, as in shot 4 above.
When doing this, place the button or logo against the background colour
of your page, and choose the transparency option. If you don't do
this, you may get a tide-mark as the object is antialiased against
the wrong background - in shot 5 the background was magenta.
The following zip files contain individual Xara files which when unzipped to appropriately named folders can be linked to the Xara X clip art gallery in the normal way: Common shapes: shapes.zip 148 kb, repeating shapes: repshapes.zip 130 kb, and mould envelopes: moulds.zip 43 kb.